How to customize the report card in XSEED Universal
How Can We Help?
< All Topics
Print
How to customize the report card in XSEED Universal
PostedNovember 5, 2022
UpdatedNovember 5, 2022
Byxseed
This video and step-by-step instructions will guide you on how to customize report cards for your school in XSEED Universal’s Student Information System (SIS).
Report Cards are mapped to specific Exam Plans and specific nodes within the exam plans, which have to be created before you can create a customized report card. Which means you will need to create custom report cards for different types of exams (for e.g. Term 1 , Term 2, Half-Yearly, End-of-Year, etc.). To learn more about creating and modifying exam plans, click here
Step 1
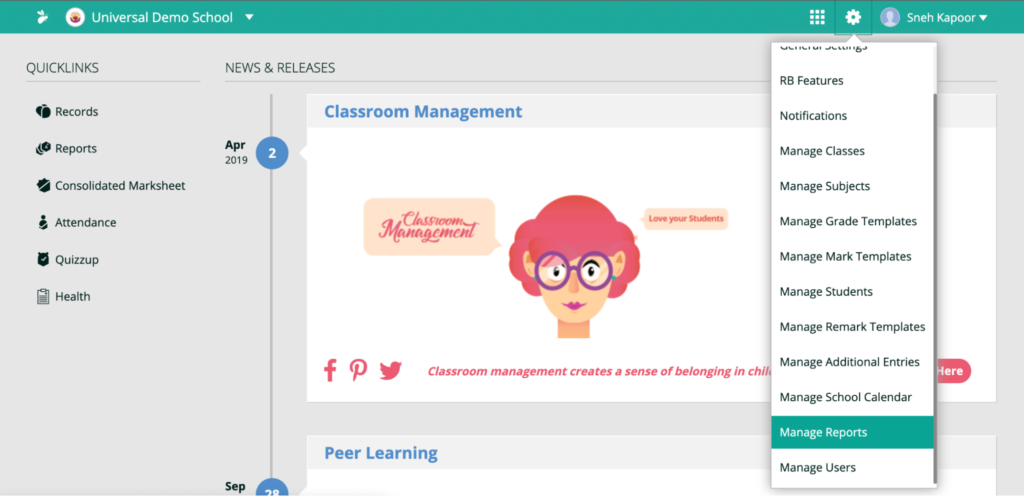
Click on Settings and choose Manage Reports.
Step 2
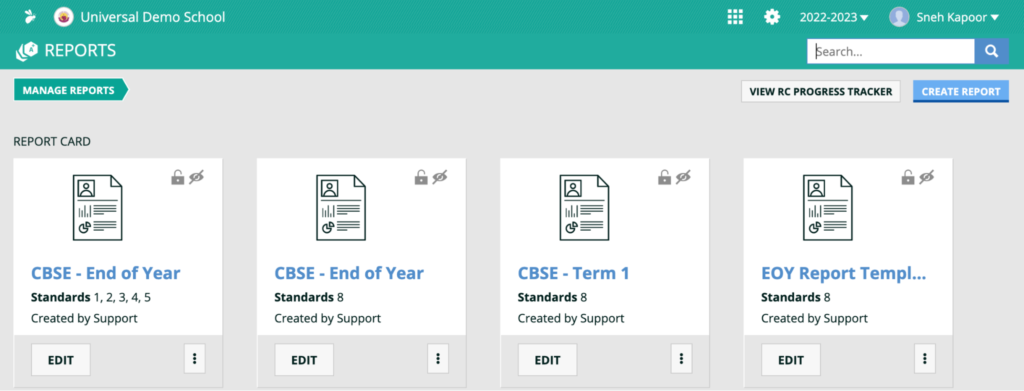
Click on the Create Report button on the top right.
Step 3
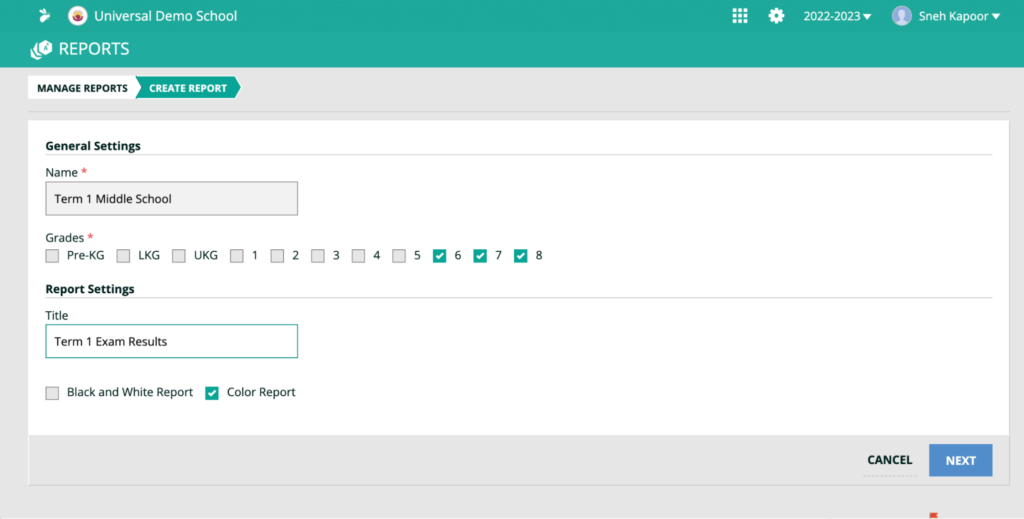
Give the report card template a name, which will indicate what type of report card it is (for example, Term 1 Middle School), then select the applicable grades, and then the title which will appear on the top of the report card (for e.g. Term 1 Exam Result) and click Next
Step 4
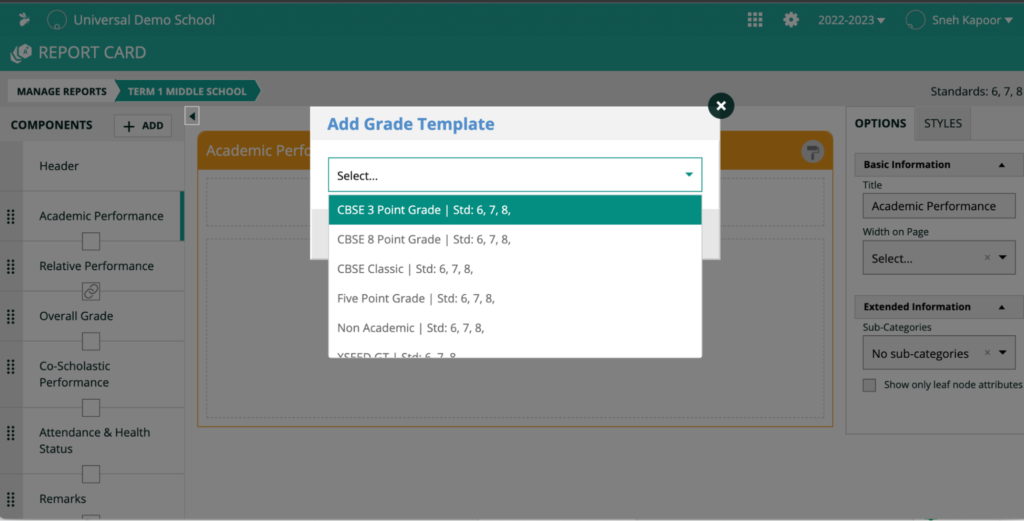
By default, some elements of the report card will be added automatically, which can be seen on the left-hand menu. Click on Academic Performance, and then click on “Add Grade Template” on the main window. Select the appropriate Grade Template.
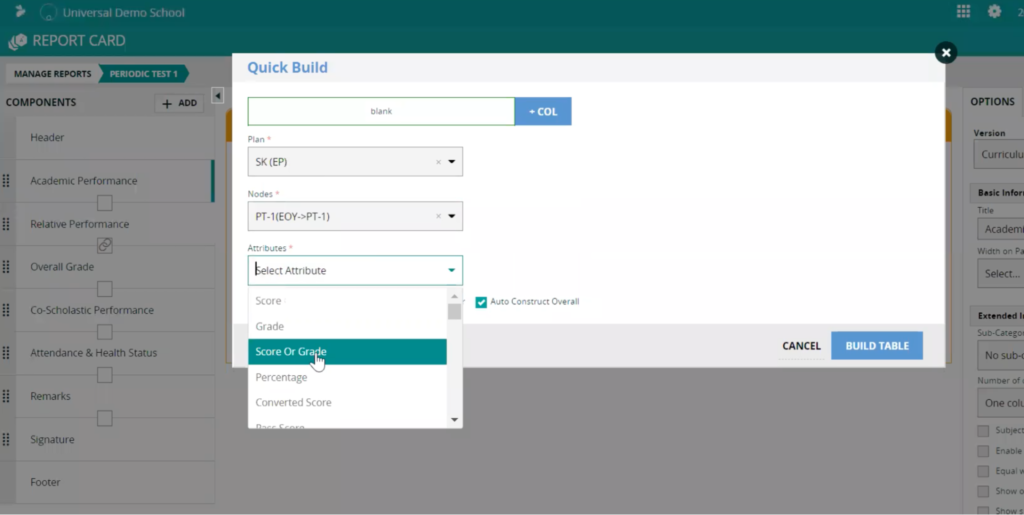
Step 5
Click on Build Table, then select the specific Exam Plan you have created or will be using for these grades, the Node, which is the exam for which this report card structure is applicable, and the attributes, which are scores or grades, or both. Click on Build Table.
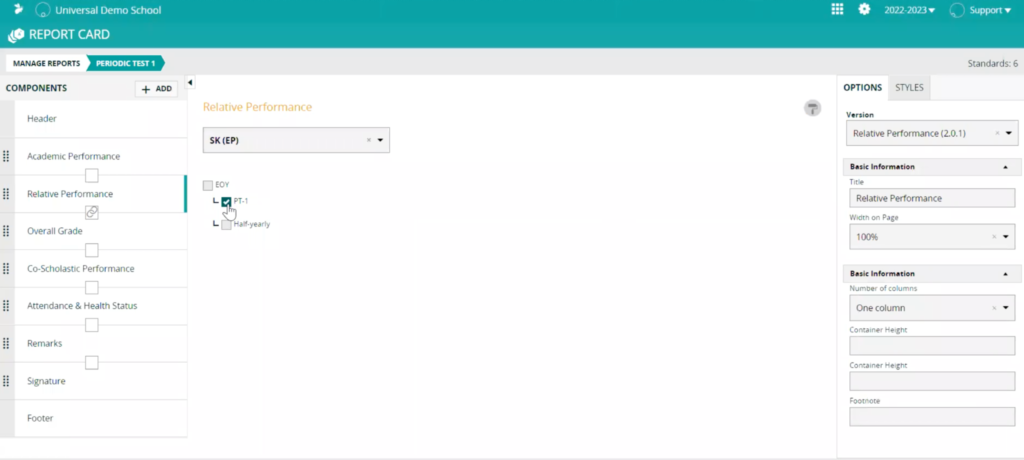
Step 6
Click on Relative Performance, Overall Grade, and Remarks, one by one, and select the correct exam plan and node for all, similar to step 5. Note that you can remove any element (for e.g. Co-scholastic performance) which are not relevant to the report card you are building. Finally click Save.
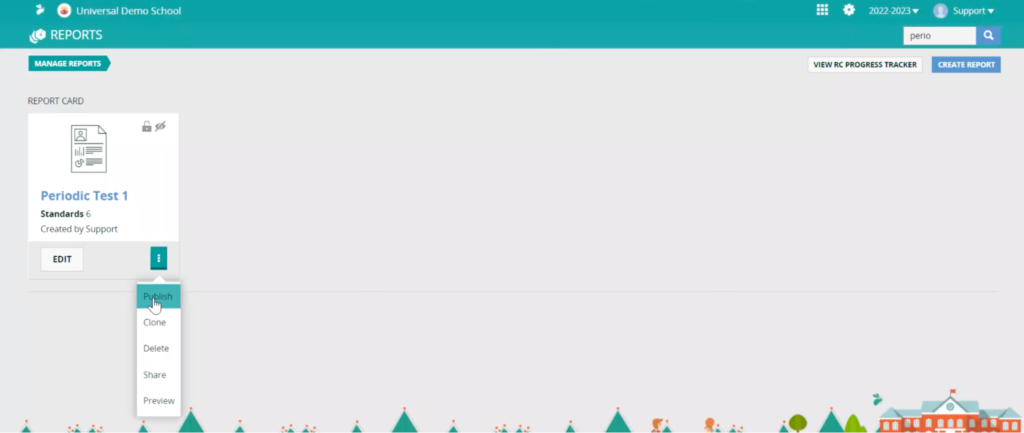
Step 7
Click on Manage Reports on the top left, to go back to the page where all report templates are available. You will be able to see the newly created report card template. Click on the 3 dots on the bottom right of the box, and click Publish. This template is now available for teachers to use.
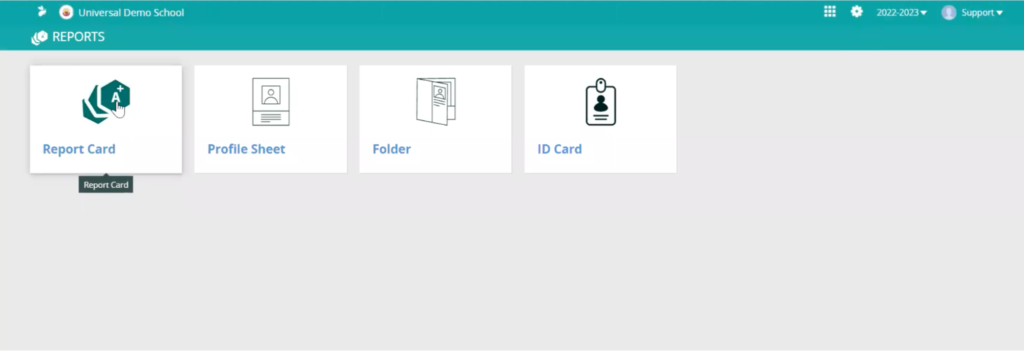
Step 8
Now click on the “All Products” grid on the top right and select Reports> Report Card.
Step 9
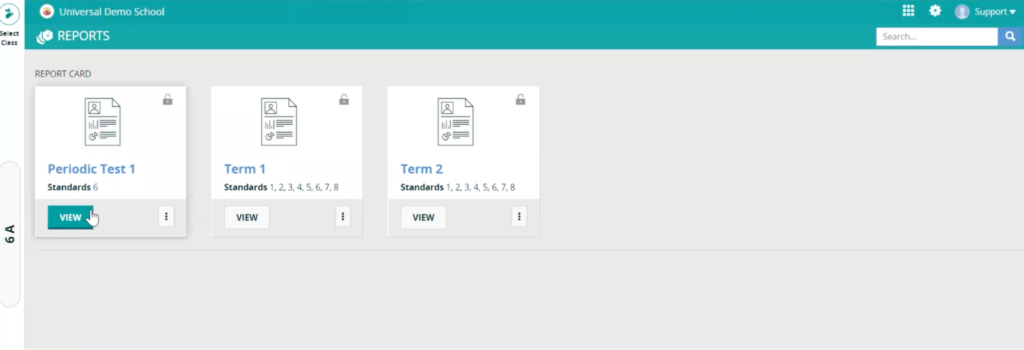
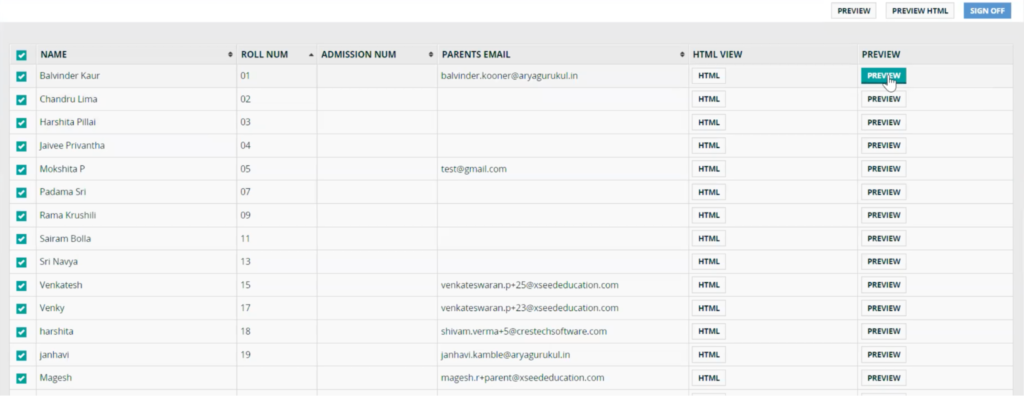
You will see the newly created report card. Click on View to see the list of students for whom the report card is now available in the new format just created.
Step 10
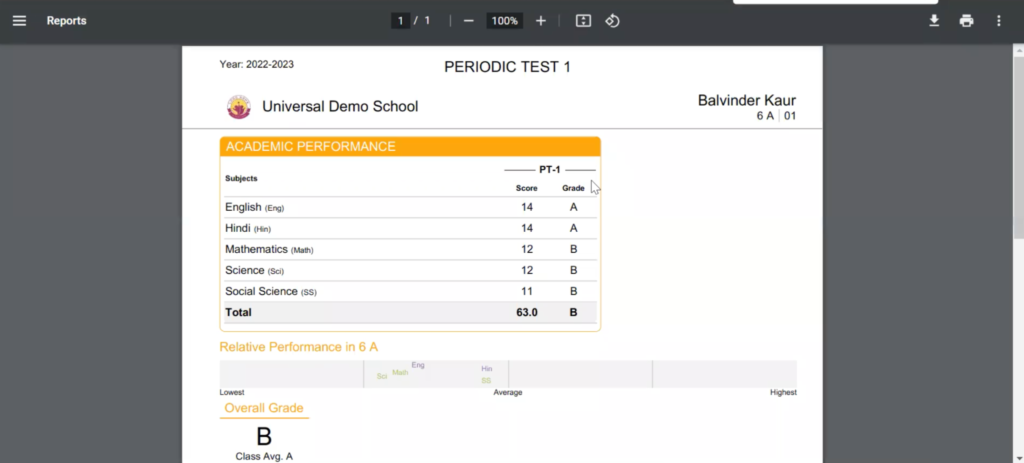
Click on Preview for any student to see a quick preview of their report card. Hit Sign-off to make the report cards instantly available to all parents on Universal.
Step 11
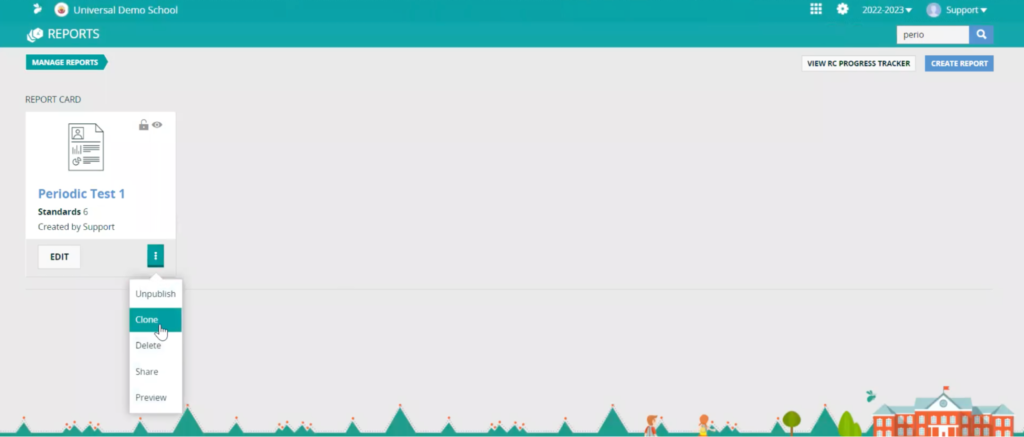
To now use a similar format of the report card for other examinations, click on Settings>Manage Reports. Select the report card just created, and click on the 3 dots at the bottom left to open the menu, and select Clone. This will create a replica of the report card you just created, which you will need to edit, by changing the node of the Exam Plan as necessary, as described in the previous steps.